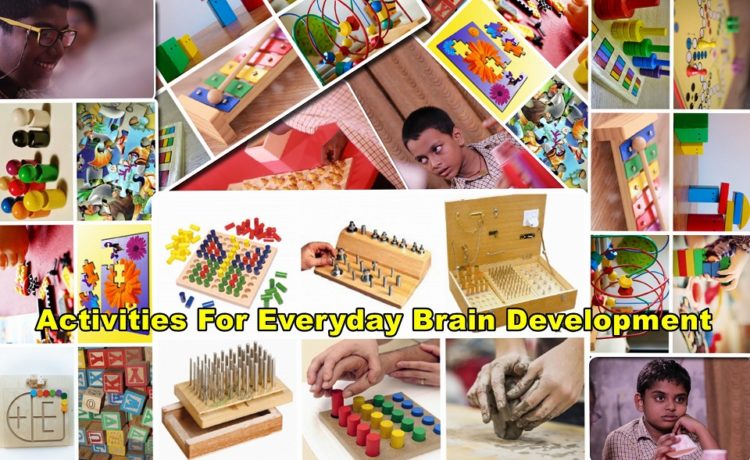
Brain Development
CHILD DEVELOPMENT: ACTIVITIES FOR EVERYDAY BRAIN DEVELOPMENT AND BUILDING
The first five years of life are when a child’s brain development is the fastest and when more than 700 neural connections are being formed every single second. What fosters healthy development during these critical early years?
Positive interaction is essential between children and the adults who care for them. Every time we connect with children, it’s not just their eyes that light up—it’s their brains too. Positive early experiences with adults strengthen the connections that a child builds up and help children to be eager, engaged, and ready for a lifetime of learning. This is called brain building.
Brain research has made significant discoveries about how the brain is stimulated through play. The hand and the brain need each other. Neurologically, “a hand is always in search of a brain and a brain is in search of a hand”. The use of the hands to manipulate three-dimensional objects is an essential part of brain development. According to the latest brain research, when kids play with blocks, pushes around toys and throw balls, their brains are being fertilized with constant neural growth.


Brain Development
The play personality of your child changes as per the age and development of your child:
Observe babies in the first nine months as they manipulate toys, they reach for, hold, release and suck on the toy. The focus is on manipulation as their finger muscles are developing and their brain uses all the five senses to learn.
From 9 to 18 months, children will be involved in function games with their toys which they toss, press and throw because they are curious to know what each toy can do.
18 months onwards when the brain is now geared for imagination, children indulge in imaginative play; they give a functional twist at a symbolic level to the toy or object. So a long block is used as a mobile phone or banana. This is the beginning of symbolic play which is the foundation of learning to read and write. When a child can visualize an object as having another function then the child will be able to see the word ‘c-a-t’ and visualize a cat.
So if kids don’t play, they don’t learn and that is why play is called the work of childhood.
So watch your kids play today and observe these schemas in their play. What is a schema? A schema is a repeated action in children.
- Trajectory– fascinated by the way they themselves or objects move through the air.
- Rotation– Children who just adore circles and anything that goes round
- Positioning– children who are always placing things in some kind of order
- Transporting– children who are always on the move, moving items and often carrying a bag
- Enveloping– children who like to cover themselves or objects as well as hiding
- Enclosure-children who love to surround or enclose either themselves or other objects
- Connecting– connectors simply enjoy attaching themselves or objects to other things
- Transforming-these children spend hours mixing
Yes, children thrive on play because their brains learn best with play. So even though play is a 4-letter word it is one of the best words that adults should speak around children. So tell your child to play today…and play along…it keeps you young!
CHILD BRAIN DEVELOPMENT AND BUILDING BASICS
Think about the experience of parenting as slowly releasing responsibility over time, starting when your child is in preschool. Your child should learn from an early age that you are her best advocate and cheerleader. At the same time, it’s your job to keep her safe and healthy by setting reasonable limits. Mutual respect, understanding, and cooperation guide every interaction.
Look – Even before babies can talk, they’re showing you what they’re interested in. Look into their eyes, or what catches their eye, and begin to build with your child.
Follow – Powerful moments are created when you let children lead the way and you follow by responding to their words, sounds, actions, and ideas.
Chat – It may not seem like it, but the sounds and gestures young children make are their way of communicating with you. So, talk out loud together—even if they can’t talk yet—and keep chatting as your children grow to engage them in learning about the world around them.
Take Turns – Back and forth interactions between you and your child are one of the most important ways to help development. So be sure to take turns while you’re talking, playing, or exploring with your children.
Stretch – Make the moment last longer by building on what your child says, or asking follow-up questions that expand your child’s thinking and learning. When you stretch the conversation with questions like, “What do you think about that?” or “How does that make you feel?” you’re stretching the building moments as well.
10 Important Activities To Stimulate Your Child’s Brain Development
1. Communicate With the Child
2. Introduce Books, Storytelling and Narrating Events
3. Ask Questions to Stimulate Thinking Process
4. Let Your Kids Explore – Touch, Feel, Smell, Taste
5. Music-Dance-Physical Activity
6. Building Event Memory, Associating Things & Situations
7. Independence
8. Age Appropriate Toys, Art and Craft
9. Logical Reasoning & Decision Making
10. The Most Important – Excellent Nutrition

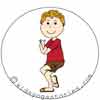
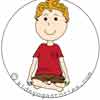
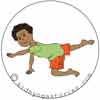
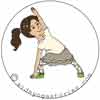
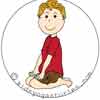
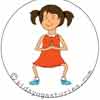
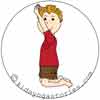
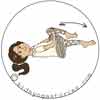
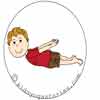
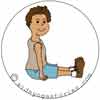
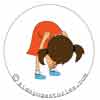
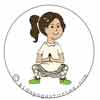
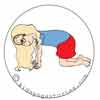
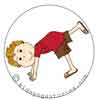
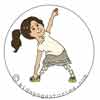
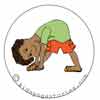
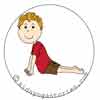
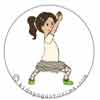
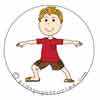
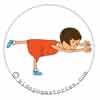
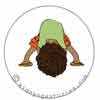
Yoga For Autistic Children
Yoga For Autistic Children


Yoga For Autistic Children
These specific yoga poses for autism/asperser’s can help a child with ASD, child with attention and Sensory challenges These skills apply to other areas in life, ultimately helping those with ASD to lead more balanced, healthy, socially integrated, and independent lives.
- To both calm and energies their bodies
- Help them develop sensory and body awareness
- Improve focus and attention
- Improve sensory information processing
- Improve communication
- Increase their self regulation
- Enhance speech, language and motor control
- Promote social interaction
- Ease transitions
- Help them learn to monitor their anxiety levels
- Foster independence and enhance self-esteem
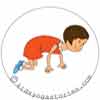
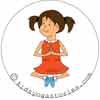
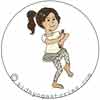
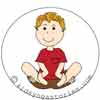
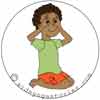
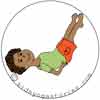
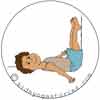
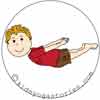
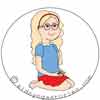
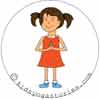
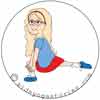
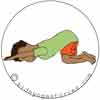
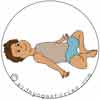
A List of Yoga for Kids (1-15)
1-Boat Pose:
(Balance on your buttocks with your legs up. Then rock in the water like a boat).
2-Bow Pose:
(Lie on your tummy, bend your knees, lift your chest, reach your arms back towards your toes, and hold onto your feet.)
3-Bridge Pose
(Lie on your back with your knees bent and your feet flat on the ground. Rest your arms down alongside your body, tuck your chin into your chest, and lift up your buttocks and back to create a bridge)
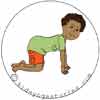
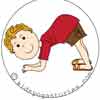
4-Cat Pose
(Come to an all-fours position, round your back, and tuck your chin into your chest. Pretend to be a kitty cat.)
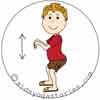
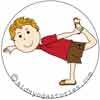
5-Chair Pose
(Stand tall in Mountain Pose with your feet hip-width apart, bend your knees, and hop like a kangaroo)
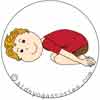
6-Child’s Pose:
(Sit on yours heels, slowly bring your forehead down to rest in front of your knees, rest your arms down alongside your body, and take a few deep breaths.)
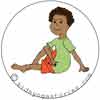
7-Cobbler Pose or Butterfly Pose
(Sit on your buttocks with a tall spine, bend yours legs, place the soles of your feet together, and gently flap your legs like the wings of a butterfly.)
8-Cobra Pose
(Lie on your tummy, place palms flat next to your shoulders, press into hands, lift head and shoulders off ground, and hiss like a snake.)
9-Cow Pose:
(On all fours, look up, arch your back, and open your chest.)
10-Cresent Moon Pose:
(From Mountain Pose, reach your arms up high over your head, bringing your palms together. Tilt your upper body to one side. Come back to center. Tilt your body to the other side.)
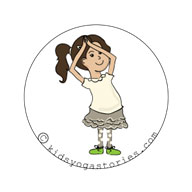
11-Dancer’s Pose:
(Stand tall in Mountain pose, stand on one leg, reach the opposite leg out behind you, place the outside of your hand, bend your torso forward with your arm out in front for balance, and arch your leg up behind you.)
12-Dancing Ganesha Pose:
(From tree pose, release your right foot and take it out front of you, with a bent right knee. Bring your hands out in front of you and hold your hands like the trunk of Ganesha, the elephant god.)
13-Dolphin Pose:
(On your hands-and-knees, bend your elbows, rest your forearms on the ground, with your palms flat, lift up your knees to straighten your legs, and look forward.)
14-Downhill skier:
(Stand tall in Mountain Pose with your feet hip-width apart and then bend your knees. Rest your elbows slightly above your knees, clasp your hands together, keep a straight spine, and look forward, pretending you are skiing down the mountain.)
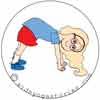
15-Downward-Facing Dog Pose:
(From a standing position, bend down and place your palms flat on the ground. Step your feet back to create an upside-down V Shape with your buttocks high in the air. Straighten your legs, relax your head and neck, and look down between your legs.)
 16-Eagle Pose:
(Stand tall in mountain Pose, wrap one leg around the other, bring your bent arms out in front of you, wrap your arms together the opposite way, and slightly bend your knees. Perch on a tree like eagle.)
 17-Easy Pose:
(Sit comfortably cross-legged, and rest your hands on your knees.)
 18-Extended Child’s Pose:
(Sit on your heels, slowly bring your forehead down to rest in front of your knees, place the palm of your hands flat out in front of you, and take a few deep breaths.)
 19-Extended Cat Pose:
(Come to all fours, extend one leg out behind you, and look forward.)
 20-Extended Mountain Pose:
(Stand tall in Mountain Pose, Look up, and reach your arms up to the sky.)
 21-Extended side Angle Pose:
(From triangle Pose, bend your front leg, rest your front elbow on your thigh, and reach your other arm straight up high to sky. look up. Repeat on the other side.)
 22-Flower Pose:
(Come to sit on your buttocks with a tall spine, lift up your legs, balance on your sitting bones, touch the soles of your feet together, and weave your arms under your legs.)
 23-Gyan Mudra Pose:
(Sit on your heels, with both hands in A-okay sign over eyes to look like the badger’s eyes.)
 24-Half Shoulder stand:
(Lie on your back with your knees bent, feet flat on the floor, arms resting alongside your body, and chin tucked in. on an exhale, push your palms down and lift your legs straight up, making an L shape with your body. Stay in this position or squeeze your belly and raise your hips. Then, bend your elbows and place your palms on your lower back for a half shoulder stand. Pretend your feet are the flickering flames and your legs are the candlesticks.)
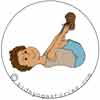 25-Happy Baby Pose:
(Lie on your back with your chin tucked in, hug your knees into your chest, then grab the outer part of your feet with both of your hands, and rock like a happy baby.)
 26-Hero Pose:
(Come back to rest upright on your heels, and twist your upper body like an owl. Turn your upper body one way and then the other.)
 27-Horse Stance:
(Stand with your legs apart, feet facing slightly outwards, bend your knees, and stand firm like a horse.)
 28-Kneeling:
(Stand on your knees, open your chest, look up-, and reach up to the moon like a fox)
 29-Knees to chest:
(Lie on your back, with your arms flat alongside your body. Bend your knees and hug them close to your chest. Then circle your legs as if you are riding a bicycle upside-down.)
 30-Legs up the wall:
(lie flat on your back then slowly raise your legs up straight towards the sky, making an L shape with your body. Flex your feet, keep your legs together, spread your arms out to either side, and keep your neck in a neutral position. You could rest your legs on wall instead.)
A List of Yoga for Kids (31-45)
 31-Locust Pose:
(Lie on your tummy, lift your chest and shoulders up, look up, clasp your hands back behind you, and glide through the water like a shark.)
 32-Lotus Mudra Pose:
(Sit on your heels, stretch fingers out in front of you, and place heels of palms together in mudra to represent spines of hedgehog.)
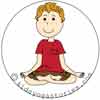 33-Lotus Pose:
(sit with a tall spine, cross your legs, and rest the palms of your hands on your knees. Relax and breathe.)

34-Lunge Pose:
(From downward-Facing dog pose, step your right foot forward to rest on the inside of your right hand. Keep a flat back, and open your chest. Switch sides.)
35-Mountain Pose:
(Stand tall with legs hip-width apart, feet facing forward, and straighten your arms alongside your body.)
36-Pigeon pose:
(From Downward-Facing Dog pose, bring right knee to rest behind right hand, placing right foot slightly inwards, and perch like a bird.)
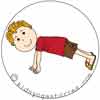
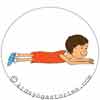
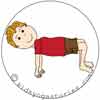
37-Plank Pose:
(Step back to balance on your palms and on your bent toes, keeping your arms straight and your back long and flat. Pretend to be an alligator floating in the water.)
38-Puppy Pose:
(From all-fours, take your hands out in front of you while lowering your chest towards the ground. Keep your arms straight, with your elbows raised off the ground, but rest your forehead between your extended arms. Let your spine curve naturally.)
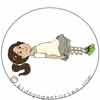
39-Reclining Butterfly Pose:
(From lying on your back, bend your legs and bring the soles of your feet together. Take your arms out to rest at your sides. Let your whole body melt into the ground and take a few deep breaths.)
40-Resting Pose or Do nothing Pose:
(Lie on your back with your arms and legs stretched out. Breathe and rest.)
41-Riverse table top Pose:
(Come to sitting with your palms flat behind you and the soles of your feet flat in front of you, Lift your buttocks to create a table, then walk like a crab.)

42-Seated Forward Bend:
(Come to sitting on your buttocks, with your legs straight out in front of you. Bend your torso forward while keeping your spine Straight. Dangle your arms in front of you like the tentacles of an octopus)
43-Seated Twist:
(Start in staff Pose with your body in an shape. Bend your right knee and place your right foot over the other side of your left knee. Check that your spine is straight and your right foot is flat on the ground. Twist your upper body to the right. Take your left elbow to your right knee and your right hand back behind you.)
44-Shark Pose:
(Lay flat on your tummy, lift up your shoulders, and clasp your arms behind your back)
45-Staff Pose:
( Sit with a tall spine with your legs straight out in front of you. Use your hands to mimic the wheels of the train going around and around.)
A List of Yoga for Kids (46-58)
46-Standing Forward Bend Pose:
(From Mountain Pose, bend your upper Body, reach for your toes, and sway your arms like a jelly fish.)
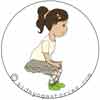
47-Squat Pose:
(Come down to a squat, and waddle like a duck.)
48-Table Top Pose:
(Come to an all-four position with your fingers spread out and palms flat on the ground. Ensure that your back and neck are in a straight but neutral position. Your shoulders should be over your wrists and your hips should be over your knees. The tops of your feet are flat on the ground.)
49-Three Legged Dog Pose:
(Step back to hands and feet, like an upside-down “V” and gently lift one leg up at a time.)
50-Tortoise Pose:
(Sit on your buttocks with your knees bent and your feet flat on the floor. Then take your feet out wide and be you are sitting with a tall, straight spine. Slide your arms under your knees and place your hands flat on the floor outside your legs. Being forward, keeping your back and neck straight.)
51-Tree Pose:
(Stand on one leg, bend your knee, place the sole of your foot on your inner thigh, and balance. Sway like a tree.)
52-Triangle Pose:
(From a standing position, step one foot back, placing the foot facing slightly outwards, take your arms up parallel to the ground, bend at your waist, tilt your upper body, reach your front hand to gently rest on your shin, and reach your other arm straight up.)
53-Triangle Forward Bend:
(From Mountain Pose, take your right foot back, keeping your ankle bent at a 30 degree angle. Place your hands on your hips, ensuring that your back is flat and that you are looking straight ahead. Then slowly bend forward as if your hips are a hinge, keeping a flat back and a long neck. Lastly, bring your hands to your hands to your shins, ankles, or the ground, depending on what feels comfortable, all the while checking that your spine straight.)
54-Upward-Facing Dog Pose:
(Lay on your belly. Place the palms of your hands next to your shoulders and look up. Then straighten your arms and expand your chest.)
55-Warrior 1 Pose:
(Come to standing in Mountain Pose. Step one foot back, slightly angling it outwards, bend your front knee, and bring your arms straight up towards the sky, and look up.)
56-Warrior 2 Pose:
(From standing position, step one foot back, placing the foot so that it is facing slightly outwards. Take your arms up in parallel to the ground, bend your front knee, and look forward.)
57-Warrior 3 Pose:
(Stand on one leg. Extend the other leg behind you. Bend your torso forward and take your arms out in front of you to pretend that you are gliding through the water like a submarine.)
58-Wide-Legged Forward Bend:
(From Mountain Pose, step your feet out wide, bend your upper body, clasp your hands together, and pretend that your arms are the trunk of an elephant.)
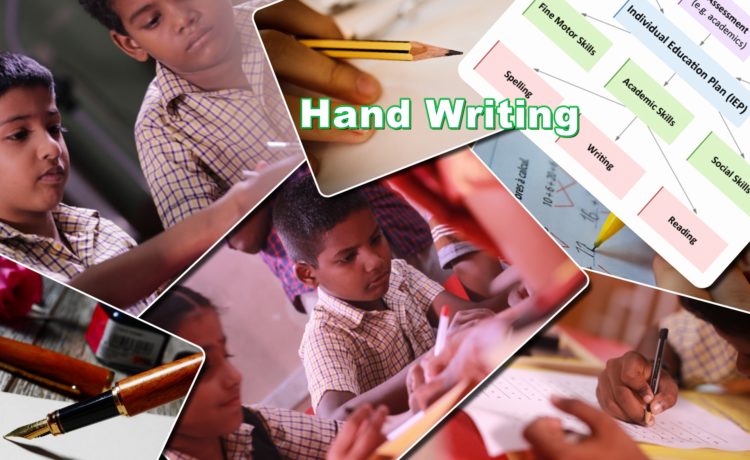
Handwriting Training
Handwriting Training


Hand writing training
Handwriting is an essential skill for both children and adults even in the age of technology. Handwriting remains the primary tool of communication and knowledge assessment for students in the classroom.
Handwriting refers to a person’s writing created with a writing utensil such as a pen or pencil. The term encompasses both printing and cursive styles and is separate from formal calligraphy or typeface. It is, in essence, a visible form of a person’s voice, including pitch and tone. Because each person’s handwriting is unique, it can be used to verify a document’s writer. The deterioration of a person’s handwriting is also a symptom or result of certain diseases.
Even in this digital age, the art of handwriting has not lost its importance in education. Many schools now require that students entering kindergarten be able to write the print manuscript alphabet, as well as their own names. While cursive script writing took a backseat for several years, its usefulness has been rediscovered, and students in the upper elementary grades are again learning how to write in cursive.
Below, you will find a large assortment of various handwriting practice worksheets which are all free to print. Some of the icons link to new pages of worksheets, such as the famous quotes. Others are basic alphabet tracing. Whether you are a classroom teacher or a parent teaching kids to write at home, you’ll find plenty of great worksheets here.
Even in this age of technology, reading and marking a child’s handwritten work is still (often unfairly) the primary way that elementary teachers figure out what their pupils know.
Kids with poor handwriting may be at a disadvantage when a teacher marks their written work. They may also struggle to write creatively or even to write down answers correctly, as it takes all their concentration and effort to just get ANYTHING down on paper.
When kids struggle to write neatly and efficiently, they are often accused of being lazy, and this may affect their behavior and self esteem.
In high school years, kids who struggle with handwriting may suffer even more as they struggle to keep up with the volume of written work required.
Skills Influencing Handwriting For Kids
Handwriting for kids is influenced by many different underlying skills. I have tried to outline most of these in this article to help parents (and teachers) to better understand why a child may be struggling with handwriting.
This page gives a brief overview of the skills that can influence handwriting for kids
- Visual motor integration
- Fine motor skills
- Eye-hand co-ordination
- Spatial Perception
- Directionality
- Sensory feedback
- Orthographic coding
- Visual perceptual skills
- Motor Planning Skills
- Cognitive Skills (intellectual ability) and language ability
- Organization and problem solving skills
- Page related to hand writing for kids
These finger exercises for kids are designed to increase the dexterity and skill of the tripod fingers, with the hope of ultimately improving your child’s pencil control and handwriting. 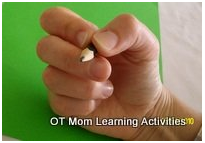
In order to control a pencil and develop good handwriting skills, a child’s hand muscles need to work well together.
In particular, as you can see from the picture above, three fingers: the thumb, index and middle fingers work together to control the pencil in what is called a dynamic tripod pencil grasp.
I refer to these 3 fingers as the tripod fingers.
Once your child has the hang of getting the tripod fingers to work together, the fingers should be able to move freely and easily in order to control a pencil for flowing handwriting.
Please note:
These OT finger exercises are designed for kids who have already had practice with using just their tripod fingers.
They can be used as exercises to improve handwriting.
- If your child is very young, or still tends to use 4 or 5 fingers on a pencil, first work on isolating the tripod fingers.
- If your child’s hand muscles are very weak, first work on some hand strengthening exercise.
Then head back for these finger exercises and activities to help improve pencil control and handwriting.
Keep the tripod fingers isolated
Finger ball walk
Play dough finger exercises
Mini paper crumpling
The Tripod Fingers
In all these finger exercises, your child needs to have the tripod fingers isolated.
I usually ask the child to hold a small piece of paper under the ring and little fingers.
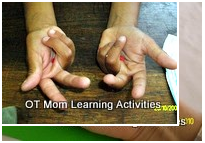
 This arch is important as it gives stability to the joints and muscles of the hands while the tripod fingers are moving and thus reduces fatigue during handwriting.
Try writing with your ring and little fingers sticking out a bit, and you can immediately feel the strain on your hand!
The kids whose hands are pictured below have not yet developed this stable arch, and all of them tire easily during handwriting tasks!
When fine motor skills are weak, it may take a child a while to get the hang of moving the tripod fingers on their own.
If your child struggles to keep the ring and little fingers down on a piece of paper, have your child hold down the fingers as shown below.
Finger Ball Walk
Introduce your child to this activity without using the tripod fingers, until they get the hang of walking the ball up and down their legs. (Or up one leg, across the tummy, and down the other leg!)
Look out for kids making grabbing movements with their hands instead of getting a WALKING movement with their fingers.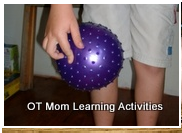
Once they have got the hang of walking their fingers, then isolate the tripod fingers as explained above.
You can also vary the size and type of ball used.
Walking DOWN the leg takes more control than walking up!
If your child has a “lazy thumb”, try using just the thumb and index fingers to walk the ball.
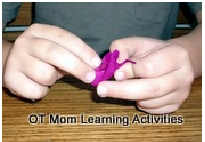
Play dough Finger Exercise
Use the tripod fingers to roll out small balls with a rolling movement of the fingers and small sausages with a back and forth movement of the fingers. Sausages can be easier than balls at first.
Mini Paper Crumpling
This is one of my favorite activities as it is so easy to have a box of different color papers on hand to add a 3D aspect to any picture.
- Cut small squares of crepe or tissue paper ahead of time (crepe holds its shape better) .
- Give your child one piece of paper at a time to squish a bit as shown above, using the tripod fingers of both
- Then ask your child to use just the tripod fingers of the dominant hand to one-handed ROLL the crumpled paper into a smaller, tighter ball.
- Use the balls to decorate a picture.
Here’s a quick tutorial on cutting those little squares quickly and easily…
1) Crepe paper usually comes folded up. Cut a strip about 3cm wide, right across the folds.
2) Cut the strip in half, and then snip the ends off so the folds are removed.
3) After both ends are snipped off, fan out the layers of crepe paper to separate them.
4) I like to keep a container of various colors of paper on hand, ready to use.
These finger exercises, and just about all my fine motor information and activities.
These finger exercises for kids are designed to increase the dexterity and skill of the tripod fingers, with the hope of ultimately improving your child’s pencil control and handwriting.
In order to control a pencil and develop good handwriting skills, a child’s hand muscles need to work well together.
In particular, as you can see from the picture above, three fingers: the thumb, index and middle fingers work together to control the pencil in what is called a dynamic tripod pencil grasp.
I refer to these 3 fingers as the tripod fingers.
Once your child has the hang of getting the tripod fingers to work together, the fingers should be able to move freely and easily in order to control a pencil for flowing handwriting.
Please note:
These OT finger exercises are designed for kids who have already had practice with using just their tripod fingers.
They can be used as exercises to improve handwriting.
- If your child is very young, or still tends to use 4 or 5 fingers on a pencil, first work on isolating the tripod fingers.
- If your child’s hand muscles are very weak, first work on some hand strengthening exercise.
Then head back for these finger exercises and activities to help improve pencil control and handwriting.
Keep the tripod fingers isolated
Finger ball walk
Play dough finger exercises
Mini paper crumpling
The Tripod Fingers
In all these finger exercises, your child needs to have the tripod fingers isolated.
I usually ask the child to hold a small piece of paper under the ring and little fingers.
This arch is important as it gives stability to the joints and muscles of the hands while the tripod fingers are moving and thus reduces fatigue during handwriting.
Try writing with your ring and little fingers sticking out a bit, and you can immediately feel the strain on your hand!
The kids whose hands are pictured below have not yet developed this stable arch, and all of them tire easily during handwriting tasks!
When fine motor skills are weak, it may take a child a while to get the hang of moving the tripod fingers on their own.
If your child struggles to keep the ring and little fingers down on a piece of paper, have your child hold down the fingers as shown below.
Finger Ball Walk
Introduce your child to this activity without using the tripod fingers, until they get the hang of walking the ball up and down their legs. (Or up one leg, across the tummy, and down the other leg!)
Look out for kids making grabbing movements with their hands instead of getting a WALKING movement with their fingers.
Once they have got the hang of walking their fingers, then isolate the tripod fingers as explained above.
You can also vary the size and type of ball used.
Walking DOWN the leg takes more control than walking up!
If your child has a “lazy thumb”, try using just the thumb and index fingers to walk the ball.
Play dough Finger Exercise
Use the tripod fingers to roll out small balls with a rolling movement of the fingers and small sausages with a back and forth movement of the fingers. Sausages can be easier than balls at first.
Mini Paper Crumpling
This is one of my favorite activities as it is so easy to have a box of different color papers on hand to add a 3D aspect to any picture.
- Cut small squares of crepe or tissue paper ahead of time (crepe holds its shape better) .
- Give your child one piece of paper at a time to squish a bit as shown above, using the tripod fingers of both
- Then ask your child to use just the tripod fingers of the dominant hand to one-handed ROLL the crumpled paper into a smaller, tighter ball.
- Use the balls to decorate a picture.
Here’s a quick tutorial on cutting those little squares quickly and easily…
1) Crepe paper usually comes folded up. Cut a strip about 3cm wide, right across the folds.
2) Cut the strip in half, and then snip the ends off so the folds are removed.
3) After both ends are snipped off, fan out the layers of crepe paper to separate them.
4) I like to keep a container of various colors of paper on hand, ready to use.
These finger exercises, and just about all my fine motor information and activities.